Introduction
Mapping interiors can be challenging, but with the right techniques and settings, you can create accurate and detailed models. In this tutorial, we'll set you up for success through the best practices for interior mapping using your Insta 360.
Note: SkyeBrowse works with all 360 cameras.
Before You Start
Use the following settings for your Insta360 to ensure the best 3D model
Ensure that you have an SD card inserted in your Insta360.
Record 4k 50fps.
Position your Insta360 above your and keep it stationary.
Ensure you have good lighting in the scene. Natural light is ideal, but fixed lighting works as well.
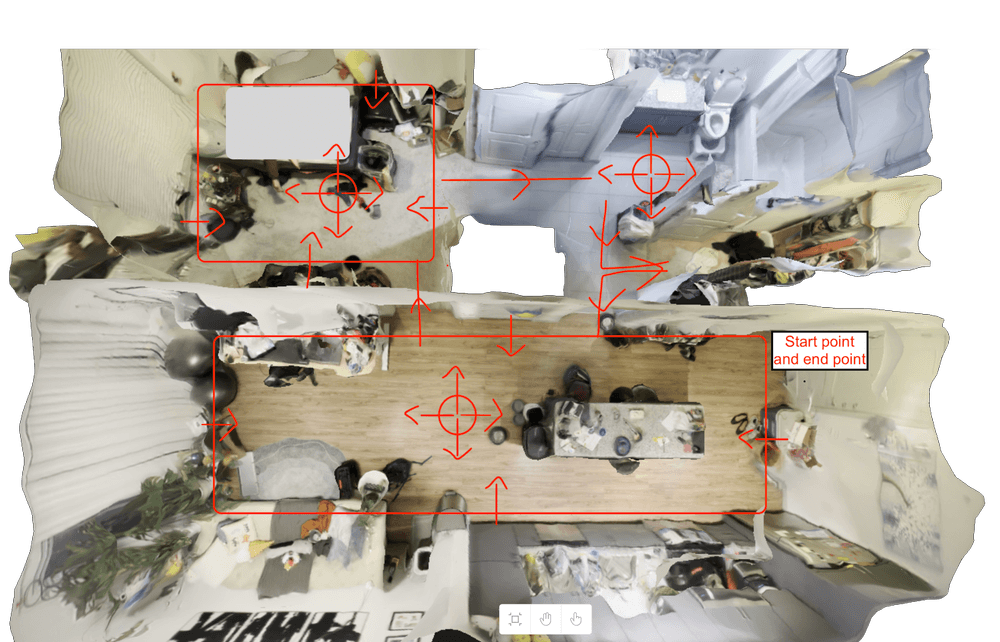
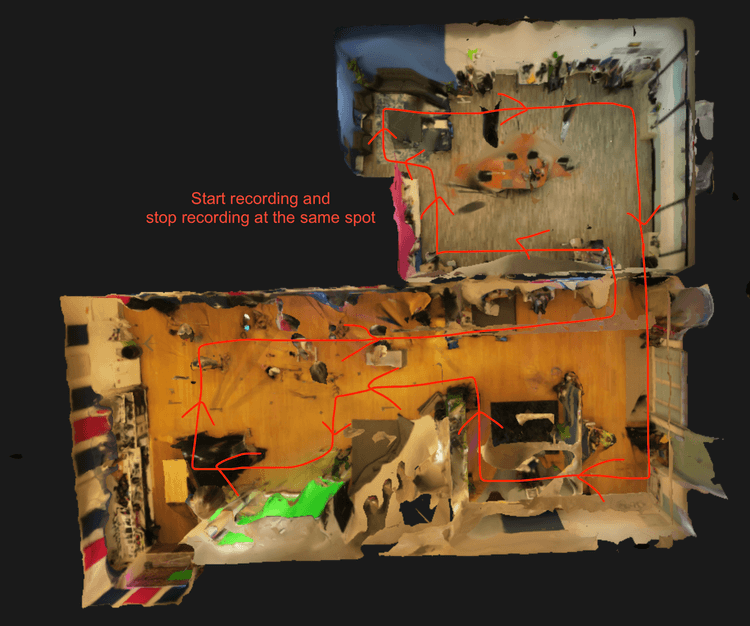
Walk around your interior space and hug the perimeters. If you are in a large room, do another pass through the center of the room.

Downloading Your 360 Video
Connection: Connect your phone to your Insta360 via the Insta360 app.
Select Your File: Choose “Album” and select your video file.
Export Your File: Go to Export > 360 > Save to Device Album and choose 4K, 25FPS, 15 Bitrate, Remove Grain. You can also increase the Bitrate for higher resolution, but the file sizes will be larger. Anything over 50 Bitrate will have a negligible impact on model quality.
Uploading to SkyeBrowse

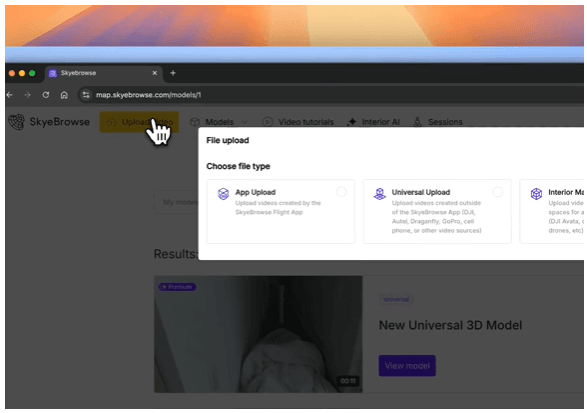
Initiate Upload: Log in to the SkyeBrowse web platform with your phone and click the ‘Upload’ button.
Select Upload Type: Choose ‘Universal Upload’ from the options.
Interior Mapping Toggle: Turn on the ‘Interior Mapping’ feature. This optimizes the processing for indoor environments.
**Uploading Videos: ** Select your video or drag & drop it into the upload box.
Get Interior 3D Model: You’ll receive an email in minutes with the link to your interior 3D model.
By following these steps, you can effectively utilize your Insta360 for interior mapping purposes. The resulting 3D models can be used for various applications such as real estate showcases, construction planning, tactical applications, and more. Happy mapping!
If you haven’t already, you can make a free account with SkyeBrowse and create your first 3D model today!

